Showing posts with label Best Practices. Show all posts

Thursday, June 6, 2013

Google Play Developer 8-Step Checkup

checkup_droid


Posted by Ellie Powers, Google Play team


Google Play gives you tons of options on publishing your apps and connecting with users. But as you get started with new features like beta testing and staged rollouts, it’s a good idea to do a checkup and make sure you’ve covered the basics.


1. Boost your developer account security


  • If you take just one step today to protect your Google Play apps, enable two-step authentication for your Google account, and encourage the rest of your team to do the same.

  • Next, many developers first set up their Google Play account with their personal gmail account, but it’s actually a good idea to transfer your apps to a separate account. All of your installations and reviews remain intact. If you haven’t done this already, transfer your apps to a new account today.

  • Don’t share passwords. Instead, add each individual who needs access and only grant the minimum level of access they need — and encourage them to enable two-step authentication.

  • Review the list of people with access regularly, and when people leave your project, make it a standard practice to remove their access. Learn more about developer account security.


2. Protect your keystore


In order to publish an update to an existing app, you’ll need to sign it with the same keystore every time. If you lose your keystore, you’ll lose your history and reviews, so you’ll need to start over with new apps with new package name and a new key, so you’ll want to make sure you protect it. First, choose a secure password, and don’t use the same password that you use for your Google account. Next, back up your keystore somewhere, but don’t upload it to Google Drive with an account you use to publish on Google Play.


3. Check your email addresses


As a developer, you are responsible for checking two important email addresses:


  • Account owner email address: Google uses the address used to register your Developer Console to contact you about your apps and account, so it is extremely important that someone is responsible for checking it regularly. If necessary, you can forward messages from this account via Gmail, or transfer your apps to another account.

  • Customer support email address: For each individual application, you can specify the best way for users to contact you for customer support. Ensure that a valid support email address for your product is specified. As a best practice, this should probably be a designated support account that is checked regularly and not the same email as the address used to login to the Developer Console.


4. Familiarize yourself with the policies


We recently launched some new guides and examples for Google Play’s Developer Program Policies and Developer Distribution Agreement. Note that once you publish an app as free, you can’t change it to a paid app later, though you can add in-app products.


5. Set up team processes


You may have many people involved with your Google Play apps. Make sure roles are clear in terms of whose job it is to publish updates, check statistics and optimization tips, read and reply to user reviews, and track revenue. Make sure all of these people have the right access to the Developer Console. Many developers who are part of larger organizations also report to their larger teams about their apps’ performance. Designate someone to make sure your app description, graphics (including localized and tablet screenshots), and pricing are up to date.


6. Configure your Developer Console UI languages


To change the language you want to see the Developer Console in, set your primary language. If you speak additional languages, configure those, too — user reviews in those languages won’t be translated automatically in the Developer Console. That was a popular request from developers.


7. Refresh your app’s marketing materials


8. Stay on top of developer news


To make sure you’re aware of the latest Google Play updates for developers, make sure you check the Android Developers blog regularly, follow +Android Developers, and check the Developer Console regularly for announcements.


Monday, October 8, 2012

Building Quality Tablet Apps

Posted by Reto Meier, Android Developer Relations Tech Lead


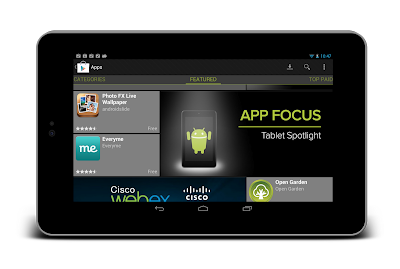
With the release of Nexus 7 earlier this year, we shared some tips on how you can get your apps ready for a new wave of Android tablets. With the holiday season now approaching, we’re creating even more ways for great tablet apps to be featured in Google Play - including a series of new app collections that highlight great apps specifically for tablet users.


To help you take advantage of the opportunity provided by the growing tablet market, we’ve put together this Tablet App Quality Checklist to make it easier for you to ensure your app meets the expectations of tablet users.


The checklist includes a number of key focus areas for building apps that are a great experience on tablets, including:

  • Optimizing your layouts for larger screens

  • Taking advantage of extra screen area available on tablets

  • Using Icons and other assets that are designed for tablet screens


Each focus area comprises several smaller tasks or best practices. As you move through the checklist, you'll find links to support resources that can help you address the topics raised in each task.


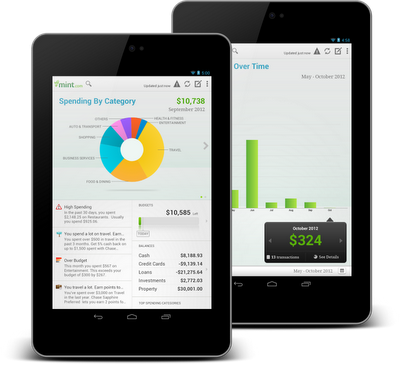
The benefits of building an app that works great on tablets is evident in the experiences of Mint.com, Tiny Co, and Instapaper who reported increased user engagement, better monetization, and more downloads from tablet users. You can find out more about their experience in these developer case studies.


The Tablet Quality Checklist is a great place to get started, but it’s just the beginning. We’ll be sharing more tablet development tips every day this week on +Android Developers. In Android Developers Live, Tuesday’s Android Design in Action broadcast will focus on optimizing user experience for tablets, on Thursday we’ll be interviewing our tablet case studies during Developers Strike Back, and on Friday’s live YouTube broadcasts of The App Clinic and Friday Games Review will be reviewing apps and games on Android tablets.


What are your best tips for building great

tablet apps?


Join the discussion on

+Android Developers


Thursday, January 26, 2012

Say Goodbye to the Menu Button

[This post is by Scott Main, lead tech writer for developer.android.com. — Tim Bray]

Before Android 3.0 (Honeycomb), all Android-powered devices included a dedicated Menu button. As a developer, you could use the Menu button to display whatever options were relevant to the user, often using the activity’s built-in options menu. Honeycomb removed the reliance on physical buttons, and introduced the ActionBar class as the standard solution to make actions from the user options immediately visible and quick to invoke. In order to provide the most intuitive and consistent user experience in your apps, you should migrate your designs away from using the Menu button and toward using the action bar. This isn’t a new concept — the action bar pattern has been around on Android even before Honeycomb. As Ice Cream Sandwich rolls out to more devices, it’s important that you begin to migrate your designs to the action bar in order to promote a consistent Android user experience.

You might worry that it’s too much work to begin using the action bar, because you need to support versions of Android older than Honeycomb. However, it’s quite simple for most apps because you can continue to support the Menu button on pre-Honeycomb devices, but also provide the action bar on newer devices with only a few lines of code changes.

If I had to put this whole post into one sentence, it’d be: Set targetSdkVersion to 14 and, if you use the options menu, surface a few actions in the action bar with showAsAction="ifRoom".

Don’t call it a menu

Not only should your apps stop relying on the hardware Menu button, but you should stop thinking about your activities using a “menu button” at all. Your activities should provide buttons for important user actions directly in the action bar (or elsewhere on screen). Those that can’t fit in the action bar end up in the action overflow.

In the screenshot here, you can see an action button for Search and the action overflow on the right side of the action bar.

Even if your app is built to support versions of Android older than 3.0 (in which apps traditionally use the options menu panel to display user options/actions), when it runs on Android 3.0 and beyond, there’s no Menu button. The button that appears in the system/navigation bar represents the action overflow for legacy apps, which reveals actions and user options that have “overflowed off the screen.”

This might seem like splitting hairs over terminology, but the name action overflow promotes a different way of thinking. Instead of thinking about a menu that serves as a catch-all for various user options, you should think more about which user options you want to display on the screen as actions. Those that don't need to be on the screen can overflow off the screen. Users can reveal the overflow and other options by touching an overflow button that appears alongside the on-screen action buttons.

Action overflow button for legacy apps

If you’ve already developed an app to support Android 2.3 and lower, then you might have noticed that when it runs on a device without a hardware Menu button (such as a Honeycomb tablet or Galaxy Nexus), the system adds the action overflow button beside the system navigation.

This is a compatibility behavior for legacy apps designed to ensure that apps built to expect a Menu button remain functional. However, this button doesn’t provide an ideal user experience. In fact, in apps that don’t use an options menu anyway, this action overflow button does nothing and creates user confusion. So you should update your legacy apps to remove the action overflow from the navigation bar when running on Android 3.0+ and begin using the action bar if necessary. You can do so all while remaining backward compatible with the devices your apps currently support.

If your app runs on a device without a dedicated Menu button, the system decides whether to add the action overflow to the navigation bar based on which API levels you declare to support in the <uses-sdk> manifest element. The logic boils down to:

  • If you set either minSdkVersion or targetSdkVersion to 11 or higher, the system will not add the legacy overflow button.


  • Otherwise, the system will add the legacy overflow button when running on Android 3.0 or higher.


  • The only exception is that if you set minSdkVersion to 10 or lower, set targetSdkVersion to 11, 12, or 13, and you do not use ActionBar, the system will add the legacy overflow button when running your app on a handset with Android 4.0 or higher.


That exception might be a bit confusing, but it’s based on the belief that if you designed your app to support pre-Honeycomb handsets and Honeycomb tablets, it probably expects handset devices to include a Menu button (but it supports tablets that don’t have one).

So, to ensure that the overflow action button never appears beside the system navigation, you should set the targetSdkVersion to 14. (You can leave minSdkVersion at something much lower to continue supporting older devices.)

Migrating to the action bar

If you have activities that use the options menu (they implement onCreateOptionsMenu()), then once the legacy overflow button disappears from the system/navigation bar (because you’ve set targetSdkVersion to 14), you need to provide an alternative means for the user to access the activity’s actions and other options. Fortunately, the system provides such a means by default: the action bar.

Add showAsAction="ifRoom" to the <item> elements representing the activity’s most important actions to show them in the action bar when space is available. For help deciding how to prioritize which actions should appear in the action bar, see Android Design’s Action Bar guide.

To further provide a consistent user experience in the action bar, we suggest that you use action icons designed by the Android UX Team where appropriate. The available icons support common user actions such as Refresh, Delete, Attach, Star, Share and more, and are designed for the light and dark Holo themes; they’re available on the Android Design downloads page.

If these icons don’t accommodate your needs and you need to create your own, you should follow the Iconography design guide.

Removing the action bar

If you don’t need the action bar, you can remove it from your entire app or from individual activities. This is appropriate for apps that never used the options menu or for apps in which the action bar doesn’t meet design needs (such as games). You can remove the action bar using a theme such as Theme.Holo.NoActionBar or Theme.DeviceDefault.NoActionBar.

In order to use such a theme and remain backward compatible, you can use Android’s resource system to define different themes for different platform versions, as described by Adam Powell’s post, Holo Everywhere. All you need is your own theme, which you define to inherit different platform themes depending on the current platform version.

For example, here’s how you can declare a custom theme for your application:

<application android:theme="@style/NoActionBar">

Or you can instead declare the theme for individual <activity> elements.

For pre-Honeycomb devices, include the following theme in res/values/themes.xml that inherits the standard platform theme:

<resources>
<style name="NoActionBar" parent="@android:style/Theme">
<!-- Inherits the default theme for pre-HC (no action bar) -->
</style>
</resources>

For Honeycomb and beyond, include the following theme in res/values-v11/themes.xml that inherits a NoActionBar theme:

<resources>
<style name="NoActionBar" parent="@android:style/Theme.Holo.NoActionBar">
<!-- Inherits the Holo theme with no action bar; no other styles needed. -->
</style>
</resources>

At runtime, the system applies the appropriate version of the NoActionBar theme based on the system’s API version.

Summary

  • Android no longer requires a dedicated Menu button, some devices don’t have one, and you should migrate away from using it.


  • Set targetSdkVersion to 14, then test your app on Android 4.0.


  • Add showAsAction="ifRoom" to menu items you’d like to surface in the action bar.


  • If the ActionBar doesn’t work for your app, you can remove it with Theme.Holo.NoActionBar or Theme.DeviceDefault.NoActionBar.

For information about how you should design your action bar, see Android Design’s Action Bar guide. More information about implementing the action bar is also available in the Action Bar developer guide.

Tuesday, November 22, 2011

Making Android Games that Play Nice

[This post is by Ian Ni-Lewis, a Developer Advocate who devotes most of his time to making Android games more awesome. — Tim Bray]


Making a game on Android is easy. Making a great game for a mobile, multitasking, often multi-core, multi-purpose system like Android is trickier. Even the best developers frequently make mistakes in the way they interact with the Android system and with other applications
 — mistakes that don’t affect the quality of gameplay, but which affect the quality of the user’s experience in other ways.

A truly great Android game knows how to play nice: how to fit seamlessly into the system of apps, services, and UI features that run on Android devices. In this multi-part series of posts, Android Developer Relations engineers who specialize in games explain what it takes to make your game play nice.

I: The Audio Lifecycle (or, why is there music coming from my pants?)

One of the most awesome things about Android is that it can do so much stuff in the background. But when apps aren’t careful about their background behaviors, it can get annoying. Take my own personal pet peeve: game audio that doesn’t know when to quit.

The problem

I’m on the bus to work, passing the time with a great Android game. I’m completely entranced by whatever combination of birds, ropes, and ninjas is popular this week. Suddenly I panic: I’ve almost missed my stop! I leap up, quickly locking my phone as I shove it into a pocket.

I arrive breathless at my first meeting of the day. The boss, perhaps sensing my vulnerability, asks me a tough question. Not tough enough to stump me, though — I’ve got the answer to that right here on my Android phone! I whip out my phone and press the unlock button... and the room dissolves in laughter as a certain well-known game ditty blares out from the device.

The initial embarrassment is bad enough, but what’s this? I can’t even mute the thing! The phone is showing the lock screen and the volume buttons are inactive. My stress level is climbing and it takes me three tries to successfully type in my unlock code. Finally I get the thing unlocked, jam my finger on the home button and breathe a sigh of relief as the music stops. But the damage is done — my boss is glowering and for the rest of the week my co-workers make video game noises whenever they pass my desk.

What went wrong?

It’s a common mistake: the developer of the game assumed that if the game received an onResume() message, it was safe to resume audio. The problem is that onResume() doesn’t necessarily mean your app is visible — only that it’s active. In the case of a locked phone, onResume() is sent as soon as the screen turns on, even though the phone’s display is on the lock screen and the volume buttons aren’t enabled.

Fixing this is trickier than it sounds. Some games wait for onWindowFocusChanged() instead of onResume(), which works pretty well on Gingerbread. But on Honeycomb and higher, onWindowFocusChanged() is sent when certain foreground windows — like, ironically, the volume control display window — take focus. The result is that when the user changes the volume, all of the sound is muted. Not the developer’s original intent!

Waiting for onResume() and onFocusChanged() seems like a possible fix, and it works pretty well in a large number of cases. But even this approach has its Achilles’ heel. If the device falls asleep on its own, or if the user locks the phone and then immediately unlocks it, your app may not receive any focus changed messages at all.

What to do about it

Here’s the easy two-step way to avoid user embarrassment:

  1. Pause the game (and all sound effects) whenever you receive an onPause() message. When gameplay is interrupted — whether because the phone is locked, or the user received a call, or for some other reason — the game should be paused.


  2. After the game is paused, require user input to continue. The biggest mistake most game developers make is to automatically restart gameplay and audio as soon as the user returns to the game. This isn’t just a question of solving the “music over lock screen” issue. Users like to come back to a paused game. It’s no fun to switch back to a game, only to realize you’re about to die because gameplay has resumed before you expected it.


Some game designers don’t like the idea of pausing the background music when the game is paused. If you absolutely must resume music as soon as your game regains focus, then you should do the following:

  1. Pause playback when you receive onPause().


  2. When you receive onResume():

    1. If you have previously received an onFocusChanged(false) message, wait for an onFocusChanged(true) message to arrive before resuming playback.


    2. If you have not previously received an onFocusChanged(false) message, then resume audio immediately.


  3. Test thoroughly!


Fixing audio embarrassments is almost always a quick and easy process. Take the time to do it right, and your users will thank you.

Wednesday, March 30, 2011

Identifying App Installations

[The contents of this post grew out of an internal discussion featuring many of the usual suspects who’ve been authors in this space. — Tim Bray]

In the Android group, from time to time we hear complaints from developers about problems they’re having coming up with reliable, stable, unique device identifiers. This worries us, because we think that tracking such identifiers isn’t a good idea, and that there are better ways to achieve developers’ goals.

Tracking Installations


It is very common, and perfectly reasonable, for a developer to want to track individual installations of their apps. It sounds plausible just to call TelephonyManager.getDeviceId() and use that value to identify the installation. There are problems with this
: First, it doesn’t work reliably (see below). Second, when it does work, that value survives device wipes (“Factory resets”) and thus you could end up making a nasty mistake when one of your customers wipes their device and passes it on to another person.

To track installations, you could for example use a UUID as an identifier, and simply create a new one the first time an app runs after installation. Here is a sketch of a class named “Installation” with one static method Installation.id(Context context). You could imagine writing more installation-specific data into the INSTALLATION file.

public class Installation {
private static String sID = null;
private static final String INSTALLATION = "INSTALLATION";

public synchronized static String id(Context context) {
if (sID == null) {
File installation = new File(context.getFilesDir(), INSTALLATION);
try {
if (!installation.exists())
writeInstallationFile(installation);
sID = readInstallationFile(installation);
} catch (Exception e) {
throw new RuntimeException(e);
}
}
return sID;
}

private static String readInstallationFile(File installation) throws IOException {
RandomAccessFile f = new RandomAccessFile(installation, "r");
byte[] bytes = new byte[(int) f.length()];
f.readFully(bytes);
f.close();
return new String(bytes);
}

private static void writeInstallationFile(File installation) throws IOException {
FileOutputStream out = new FileOutputStream(installation);
String id = UUID.randomUUID().toString();
out.write(id.getBytes());
out.close();
}
}

Identifying Devices

Suppose you feel that for the needs of your application, you need an actual hardware device identifier. This turns out to be a tricky problem.

In the past, when every Android device was a phone, things were simpler: TelephonyManager.getDeviceId() is required to return (depending on the network technology) the IMEI, MEID, or ESN of the phone, which is unique to that piece of hardware.

However, there are problems with this approach:

  • Non-phones: Wifi-only devices or music players that don’t have telephony hardware just don’t have this kind of unique identifier.


  • Persistence: On devices which do have this, it persists across device data wipes and factory resets. It’s not clear at all if, in this situation, your app should regard this as the same device.


  • Privilege:It requires READ_PHONE_STATE permission, which is irritating if you don’t otherwise use or need telephony.


  • Bugs: We have seen a few instances of production phones for which the implementation is buggy and returns garbage, for example zeros or asterisks.


Mac Address

It may be possible to retrieve a Mac address from a device’s WiFi or Bluetooth hardware. We do not recommend using this as a unique identifier. To start with, not all devices have WiFi. Also, if the WiFi is not turned on, the hardware may not report the Mac address.

Serial Number

Since Android 2.3 (“Gingerbread”) this is available via android.os.Build.SERIAL. Devices without telephony are required to report a unique device ID here; some phones may do so also.

ANDROID_ID

More specifically, Settings.Secure.ANDROID_ID. This is a 64-bit quantity that is generated and stored when the device first boots. It is reset when the device is wiped.

ANDROID_ID seems a good choice for a unique device identifier. There are downsides: First, it is not 100% reliable on releases of Android prior to 2.2 (“Froyo”). Also, there has been at least one widely-observed bug in a popular handset from a major manufacturer, where every instance has the same ANDROID_ID.

Conclusion

For the vast majority of applications, the requirement is to identify a particular installation, not a physical device. Fortunately, doing so is straightforward.

There are many good reasons for avoiding the attempt to identify a particular device. For those who want to try, the best approach is probably the use of ANDROID_ID on anything reasonably modern, with some fallback heuristics for legacy devices.

Thursday, October 21, 2010

Improving App Quality

[This post is by Roman Nurik, who is passionate about icons. —Tim Bray]

With thousands of new apps being published in Android Market every week, it’s becoming more and more important to proactively work at breaking through the clutter (hooray for marketing jargon!). One way of improving your app’s visibility in the ecosystem is by deploying well-targeted mobile advertising campaigns and cross-app promotions. However, there’s another time-tested method of fueling the impression-install-ranking cycle: improve the product!

A better app can go a very long way: a higher quality app will translate to higher user ratings, generally better rankings, more downloads, and higher retention (longer install periods). High-quality apps also have a much higher likelihood of getting some unanticipated positive publicity such as being featured in Android Market or social media buzz.

The upside to having a higher-quality app is obvious. However, it’s not always clear how to write a so called ‘better app.’ The path to improving app quality isn’t always well-lit. The term ‘quality’, and its close cousins ‘polish’ and ‘fit and finish’ aren’t always well-defined. In this post, we’ll begin to light the path by looking at a couple of key factors in app quality, and furthermore, look at ways of improving your app along these dimensions.

Listen to your users

Given that pretty much any measure of the ‘success’ of an app involves user-related metrics such as number of downloads, daily actives, retention rates, etc., it’s a good idea to start thinking of your app’s quality as it relates back to your users.

The most obvious way to listen to users is by reading and addressing comments on your app in Android Market. Although the comments aren’t always productive or constructive, some will provide valuable insight on aspects of your app that you may not have consciously considered before. It’s important to remember that users have the opportunity to change their ratings and comments about an app as much as they’d like.

Now, since Android Market doesn’t currently provide a bidirectional communication medium for developers and their users, you should set up your own support and discussion destination(s). There are some great support tools out there that can put you in touch with your users directly such as Google Groups, Zoho Discussions, getsatisfaction.com and uservoice.com. Once you get set up with such a tool, make sure to fill in the support link in your Android Market listing -- users do click through to these.

Another way to better listen to your users is by having a public beta or trusted tester program. It’s crucial to have some amount of real user testing before releasing something in Android Market. Fortunately, you can distribute your apps to users outside of Market via a website; this website can require a login or be publicly accessible — it’s entirely up to you. Take advantage of this opportunity by offering your next planned update to some early adopters, before submitting to Market. You’ll be surprised by how many little, yet impactful, improvements can come out of crowd-sourced, real-user testing.

Improve stability and eliminate bugs

I won’t go into detail about why this is important, because hopefully it’s obvious. And hopefully you’ve been reading this blog and following the best practices outlined in previous posts, so you have a solid idea on how to improve in this arena.

One noteworthy and yet relatively underused tool for catching stability issues like crashes, is the UI/Application Exerciser Monkey (aka Monkey). Monkey will send random UI events to your app’s activitie, allowing you to trigger user flows that can uncover stability problems.

Also, with the new error reporting features in Android 2.2, users now have the ability to report application crashes to developers. These show up in aggregate in the Android Market developer console. Make sure to read these reports and act on them appropriately.

Lastly, keep an external bug and feature request tracker. This will enable your users to engage with the app at a closer level, by following features and bugs that affect them. User frustration with app problems can be effectively managed with diligent issue tracking and communication. Some of the community support tools listed above offer issue tracking features, and if your project is open source, most popular repository hosting sites such as Google Code and GitHub will offer this as well.

Improve UI Responsiveness

One sure-fire way to tick off your users is to have a slow UI. Research has shown that speed matters... for any interface, be it desktop, web, or mobile. In fact, the importance of speed is amplified on mobile devices since users often need their information on the go and in a hurry.

As Brad Fitzpatrick mentioned in his Google I/O 2010 talk, Writing Zippy Android Apps, you can improve your apps’s UI responsiveness by moving long-running operations off the application’s main thread. See the talk for detailed recommendations and debugging tips.

One way to improve UI performance is to minimize the complexity of your layouts. If you open up hierarchyviewer and see that your layouts are more than 5 levels deep, it may be time to simplify your layout. Consider refactoring those deeply nested LinearLayouts into RelativeLayout. As Romain Guy pointed out in his World of ListView talk at Google I/O, View objects cost around 1 to 2 KB of memory, so large view hierarchies can be a recipe for disaster, causing frequent VM garbage collection passes which block the main (UI) thread.

Lastly, as Tim pointed out in Traceview War Story, tools like traceview and ddms can be your best frends for improving performance by profiling method calls and monitoring VM memory allocations, respectively.

More resources:

Improve usability

I’ll say it again here, listen to your users! Ask a handful of real Android device users (friends, family, etc.) to try out your application and observe them as they interact with it. Look for cases where they get confused, are unsure how to proceed, or are surprised by certain behaviors. Minimize these cases by rethinking some of the interactions in your app, perhaps working in some of the user interface patterns the Android UI team discussed at Google I/O.

In the same vein, two problems that currently plague Android user interfaces are small tap targets and overly small font sizes. These are generally easy to fix and can make a big impact. As a general rule, optimize for ease of use and legibility, while minimizing, or at least carefully balancing, information density.

Another way to incrementally improve usability, based on real-world data, is to implement Analytics throughout your app to log usage of particular sections. Consider demoting infrequently used sections to the options menu, or removing them altogether. For oftenly-used sections and UI elements, make sure they’re immediately obvious and easily accessible in your app’s UI so that users can get to them quickly.

Lastly, usability is an extensive and well-documented subject, with close ties to interface design, cognitive science, and other disciplines. If you’re looking for a crash-course, start with Donald Norman’s The Design of Everyday Things.

Improve appearance and aesthetics

There’s no substitute for a real user interface designer — ideally one who’s well-versed in mobile and Android, and ideally handy with both interaction and visual design. One popular venue to post openings for designers is jobs.smashingmagazine.com, and leveraging social connections on Twitter and LinkedIn can surface great talent.

If you don’t have the luxury of working with a UI designer, there are some ways in which you can improve your app’s appearance yourself. First, get familiar with Adobe Photoshop, Adobe Fireworks, or some other raster image editing tool. Mastering the art of the pixel in these apps takes time, but honing this skill can help build polish across your interface designs. Also, master the resources framework by studying the framework UI assets and layouts and reading through the new resources documentation. Techniques such as 9-patches and resource directory qualifiers are somewhat unique to Android, and are crucial in building flexible yet aesthetic UIs.

The recently-published Android UI Design Tips slide deck contains a few more best practices for your consideration.

Deliver the right set of features

Having the right set of features in your app is important. It’s often easy to fall into the trap of feature-creep, building as much functionality into your app as possible. Providing instant gratification by immediately showing the most important or relevant information is crucial on mobile devices. Providing too much information can be as frustrating (or even more so) than not providing enough of it.

And again, listen to your users by collecting and responding to feature requests. Be careful, though, to take feature requests with grains of salt. Requests can be very useful in aggregate, to get a sense of what kinds of functionality you should be working on, but not every feature request needs to be implemented.

Integrate with the system and third-party apps

A great way to deliver a delight user experience is to integrate tightly with the operating system. Features like app widgets, live folders, global search integration, and Quick Contacts badges are fairly low-hanging fruit in this regard. For some app categories, basic features like app widgets are par for the course. Not including them is a sure-fire way to tarnish an otherwise positive user experience. Some apps can achieve even tighter OS integration with the new contacts, accounts and sync APIs available in Android 2.0 and later. A few sample apps that show how to use these APIs are SampleSyncAdapter (bundled with the SDK samples) and JumpNote.

Third-party integrations can provide even more user delight and give the user a feeling of device cohesiveness. It’s also a really nice way of adding functionality to your app without writing any extra code (by leveraging other apps’ functionalities). For example, if you’re creating a camera app, you can allow users to edit their photos in Photoshop Express before saving them to their collection, if they have that third-party application installed. More information on this subject is available in the Can I Use this Intent? article.

More resources:

Pay attention to details...

One particular detail I’ll call out is in icon quality and consistency. Make sure your app icons (especially your launcher icon) are crisp and pixel-perfect at all resolutions, and follow the icon guidelines, at least in spirit if not in letter. If you’re having trouble or don’t have the resources to design the icons yourself, consider using the new Android Asset Studio tool (a project I’ve recently open-sourced) to generate a set.

...and more...

Along with this blog, make sure to follow @AndroidDev on Twitter — we’re constantly collecting and sharing tips and tricks on Android application development that you won’t always find anywhere else. And of course, don’t be afraid to ask questions in our support forums on Stack Overflow and Google Groups.

Thanks for reading!